|
Antique-
A general term
meaning to apply a color product to the ceramic piece and then using a
quality paper towel or soft cloth, wipe back the product from the piece
to desired intensity. Antiquing is done with opaques, metallics and
translucents in the techniques that follow. When antiquing with opaques
and metallics, be sure to work in small sections and wipe the color back
quickly to prevent the color from drying before wiping back. Water can
be used to help wipe back water-based and water-soluble color products.
Antique Media and Antique Solvent can be used to help wipe back
oil-based products.
|
|
Apply-
Use a brush of
appropriate size and shape (this will vary with color product and area
of application) to move color product from pallet to the given ceramic
area.
|
|
BC-Basecoat-
Use a quality
large soft brush to apply 2 thorough smooth coats of given color product
to bisque. It is essential that the piece is covered both completely and
smoothly. Be sure to work out any brush strokes before the color product
has dried. An airbrush can also be used when applying a basecoat.
|
|
Blush-
Very lightly
drybrush indicated color product to create a very slight coloring
effect. This term is most often used in reference to applying color to
cheeks, above eyes, paw pads or tummies. Detail- Carefully apply
designated colors to the fine details given. Refer to the catalog photo
for exact positioning.
|
|
Dot-
With the use of a
dotting tool or a round toothpick apply color in a uniform “swiss dot”
pattern.
|
|
DB-Drybrush-
Dip a stiff
round brush of appropriate size into the selected color. With a vigorous
“figure 8” motion, wipe a great deal of the color product back out of
the tip of the brush onto a paper towel. Stroke the brush rapidly back
and forth across the texture of the ceramic piece. Your goal in
drybrushing is to color the high ridges and details more intensely then
the lower grooves. It is important to monitor the amount of color
product on your brush at all times. Too much color can fill the grooves
and not enough color can lead to a rough surface texture (chalky) from
over stroking.
|
|
Flick-
Use a small detail
brush to apply a small stroke of indicated color to area. Many times
more then one small stroke of color will need to be “flicked” into an
area to achieve desired effect.
|
|
Float-
Using a water
moistened filbert or square shader brush, load one side of the brush
with thinned color product. Stroke the brush briefly onto the pallet to
slightly distribute color across the brush. Contact the ceramic piece
with the color-loaded edge of the brush closest to the ceramic feature
to be enhanced and make an even brush stroke following the contours.
This technique may require some practice on a pallet or tile. The goal
in floating is to use a shaded brush stroke, fading from an intense edge
to a less intensely colored edge across the brush to enhance shadows and
contours on the ceramic piece.
|
|
HL-Highlighting-
This term
is often used to indicate drybrushing or rouging with a VERY light hand.
When you highlight with a color product, your goal is to gingerly
drybrush or rouge this color in a designated area for a subtle coloring
effect. The HL abbreviation is also used in techniques to designate eye
highlights. To create an eye highlight, apply a dot of given color using
a dotting tool or a toothpick to the upper section of iris. When
highlighting eyes, be careful to place the dot of color in the same
position and angle on both the left and right eye. Line- Using a detail
brush, paint lines of color onto indicated areas. Referring to the
catalog picture is often helpful. Paint- Use a brush of appropriate size
to carefully and completely apply the indicated color products to
designated ceramic areas.
|
|
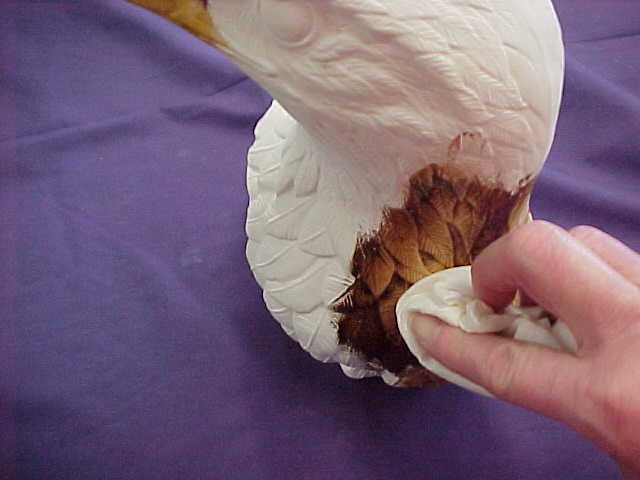
PB-Pat Back-
After applying
the indicated Intense Translucent, Use a cloth or quality paper towel
and wipe or pat back the applied color to desired intensity.
|
|
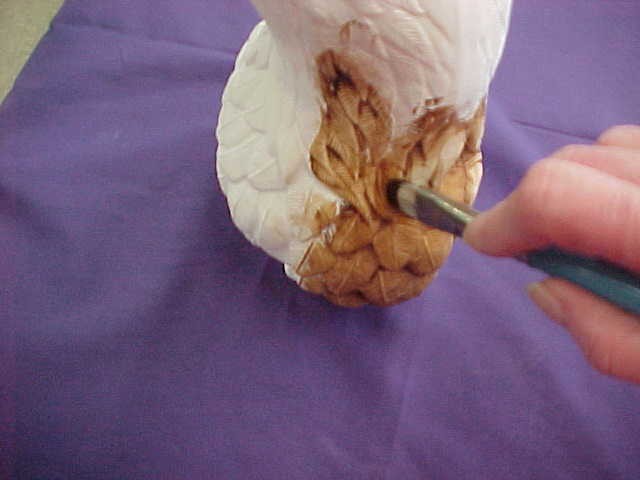
Rouge-
Use a quality paper
towel wrapped around an index finger to apply an additional Intense
Translucent color to an initial color, by tipping the towel wrapped
finger with a small amount of the selected Intense Translucent from your
pallet. Rub the color first onto a clean area of your pallet and then
onto the desired area of the piece. The rouged color will highlight the
raised areas while leaving the crevices with initial color. Shade-
Stipple or float given color product to create the illusion of a shadow
to enhance the designated ceramic feature. Slashes- This term is used to
refer to the small stroke of color placed below the pupil in the iris of
an eye. A thin slash of color should be placed along the contour of the
pupil at a direct angle below a highlight dot. The highlight dot
indicates a reflection of light from the eye surface and a slash of
color below indicates the light shining through the pupil into the iris.
(used in techniques concerning feathers.)
|
|
Touch-up-
Apply the given
color onto the indicated area to conceal any incidental color overflows
or strokes common in wetbrushing and drybrushing.
|
|
WB-Wetbrush-
Like
drybrushing, this technique requires the wiping out of color product
from a stiff round brush. However, in wetbrushing, you will leave a
considerable amount of color in your brush. The goal in wetbrushing is
to create a smooth intense color with less gradation from light to dark
then in drybrushing. This technique is selected many times when the
artist wants to bring a dark smooth surface up to a bright intensity
with out the “chalky-ness” often accompanying drybrushing.
|
|
Wipe Back-
Similar to Pat
Back, but if a less intense color is desired, use water or Antique Media
to wipe back color.
|
|
Basic Instructions for Using Kimple Intense Translucents -
1. Basecoat bisque carefully
cleaned and fired bisque with #750 Bisque Primer. Using a Kimple “I.T.”
sable filbert brush and cover bisque smoothly and thoroughly with 2
coats.
2. After basecoat is dry, apply
desired Intense Translucent to bisque using a Kimple “I.T.” sable
filbert brush to appropriate area.
3. Using a cloth or quality paper
towel, wipe or pat back the applied color to desired intensity. If a
less intense color is desired, use water or Antique Media to pat back
color. Using water to wipe back will pull more color off of the piece
then the use of Antique Media will. Antique Media will blend the color
more subtilely.
4. If desired, using either of the
following methods, apply another color of Intense Translucents to this
initial color: --Rouging- To use a towel to apply additional colors to
the initial color, tip a section of towel with a small amount of the
selected Intense Translucent from your pallet. Rub the color onto a
clean area of your pallet to distribute the color evenly into the towel
tip. Then rub the color onto the desired area of the ceramic piece.
-Applying color with a towel creates a highlighted or “rouged” effect.
--Brush Application- To use a brush to apply additional color to the
initial color, simply use a Kimple “I.T.” sable filbert brush to apply
the desired color to the selected area and pat the color back with a
towel. -Applying color with a brush removes more of the initial
translucent then rouging, resulting in a more vivid secondary color.
5. After every area of the piece
has been completed carefully spray the piece with Perfect Matte fixative
in a well ventilated area. Do not over apply the fixative. Intense
Translucents will remain slightly tacky until dry and fixed with a
sealer.
|
|
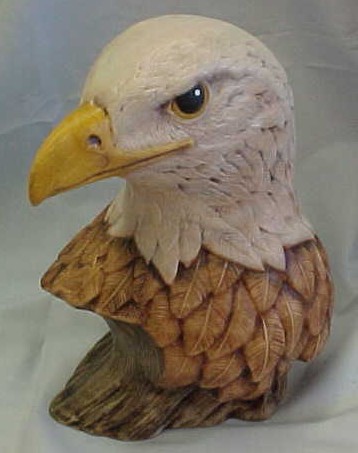
Other Tips and Hints-
#702 Walnut applied as the
initial translucent followed by variously selected and applied Intense
Translucent colors is a very effective technique to achieve deep rich
colors often desired in old world santas, wildlife and Native American
pieces.
Any of the Intense Translucent
colors can by diluted with water to create lovely washed finishes. They
can also be used to create fascinating and creative “brush stroke”
pieces.
An intriguing opalescent effect
can be obtained by mixing any of the Intense Translucent colors with
#971 Water Based Gold or #972 Water Based Silver. The mixing ratio will
vary depending upon the color intensity desired. This mixture can then
be applied to the ceramic piece as an opaque colorant or wiped back
before drying to create the effect of an opalescent antique. When
combining water based metallics with Intense Translcuents you must be
aware that the water based metallic mixture will dry before the piece is
fixed with a spray.
|